Friday, January 24, 2025

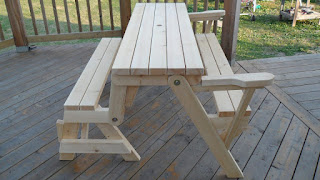
Build Your Dream Picnic Table: A Beginner's Guide

Hey there, fellow DIY enthusiasts! So you're dreaming of a beautiful, sturdy picnic table in your backyard, but the thought of building it yourself seems a little… daunting? Don't worry, you're not alone! This step-by-step guide will walk you through the process, making it easy enough for even the most novice woodworker. Grab your tools, let's get started!

Planning Your Picnic Table Project

Before we dive into sawing and hammering, let's get organized. This is the crucial planning stage, and it’ll save you headaches (and potentially some wood!) down the line.

Choosing Your Wood

The type of wood you choose will affect both the look and the durability of your table. Pressure-treated lumber is a popular choice for outdoor projects because it resists rot and insects. Cedar and redwood are also excellent options, offering natural resistance to the elements and a beautiful aesthetic. However, they're generally more expensive. Consider your budget and desired lifespan when making your selection. Remember to always source wood from responsible suppliers.

Designing Your Table

While you can find plenty of pre-made plans online, I encourage you to sketch out your own design! This is your picnic table, after all, so it should reflect your style. Consider the following:

  • Size: How many people do you want to seat comfortably? A standard picnic table seats six to eight people.
  • Height: Standard picnic table height is around 28-30 inches. Adjust this based on your family's height preferences.
  • Style: Do you want a classic rectangular design or something more unique? Will you include a bench on each side, or just one long bench and separate chairs?
  • Features: Are you adding any extra features, like umbrella holes or built-in storage?

Gathering Your Materials and Tools

Once you have your design, create a detailed materials list. This will ensure you have everything you need before you begin. For a standard picnic table, you'll likely need:

  • Pressure-treated lumber (2x4s, 2x6s, and 4x4s)
  • Wood screws (various sizes)
  • Wood glue
  • Level
  • Measuring tape
  • Circular saw or hand saw
  • Drill with drill bits
  • Safety glasses
  • Work gloves
  • Clamps (helpful but not essential)
  • Pencil

Building the Table Base

Now for the fun part! We'll start by building the sturdy foundation of your picnic table.

Creating the Legs

Using your 4x4s, cut four pieces to the desired height of your table legs. You might find it helpful to use a miter saw for accurate cuts, but a hand saw will work just fine too. Make sure your cuts are square and even for maximum stability.

Assembling the Base Frame

Next, you'll create the frame that connects the legs. Using your 2x6s, cut four pieces to the length of your table's width. These pieces will form the top and bottom rails of your base. Securely attach these rails to the legs using wood screws and wood glue. Ensure that the frame is square and level using your level throughout the process.

Adding Support Beams

To provide extra strength and stability, add support beams across the base frame. Cut 2x4s or 2x6s to fit the length of the table between the legs. These beams will help prevent sagging and create a more robust structure. Attach them with screws and glue.

Constructing the Tabletop and Seats

With the base completed, let’s move on to the part where your picnic table really comes to life.

Building the Tabletop

Lay out your 2x6s or 2x8s (depending on your preferred thickness) to create the tabletop. Ensure the boards are butted together tightly with little to no gaps. Pre-drill pilot holes before screwing the boards together. This prevents the wood from splitting, especially with harder woods. You can use wood glue for extra strength and to fill any small gaps.

Attaching the Tabletop to the Base

Carefully lift the completed tabletop and place it on top of the base frame. Securely attach it to the frame using wood screws, ensuring even weight distribution. You might want to use longer screws for this step to ensure a solid connection.

Creating the Seats

The construction of the seats will depend on your design. For a bench-style seat, you’ll create a frame using 2x4s similar to the table base, but smaller. Attach the seat boards to the frame in the same manner as the tabletop. Securely attach the completed seat frames to the table base.

Finishing Touches and Finishing Your Picnic Table

You're almost there! It's time to put the finishing touches on your handiwork.

Sanding

Once your picnic table is fully assembled, thoroughly sand all surfaces smooth. This will ensure a comfortable seating experience and help the finish adhere better. Start with coarser sandpaper and gradually work your way to finer grit for a smooth finish.

Applying a Finish

Applying a sealant or stain is crucial for protecting your picnic table from the elements and extending its lifespan. Choose a weather-resistant sealant specifically designed for outdoor use. Follow the manufacturer’s instructions carefully for best results. Allow sufficient drying time between coats.

Final Inspection

Before you celebrate your amazing accomplishment, take a moment to double-check everything. Ensure all screws are tightened, the table is level, and the finish is evenly applied.

Frequently Asked Questions

Q: Can I use different types of wood?

A: Yes, but pressure-treated lumber is recommended for outdoor durability. Other woods like cedar and redwood are beautiful but more expensive and require more maintenance.

Q: How long will this project take?

A: Depending on your experience and pace, you can expect to spend anywhere from a weekend to a few days building this picnic table.

Q: Do I need power tools?

A: A circular saw or jig saw will make the job easier, but it's possible to build the table with hand saws, though it will require more time and effort.

Q: What if my table isn't perfectly level?

A: Use shims (small pieces of wood) under the legs to adjust the level. Check the level frequently throughout the construction.

Q: How do I maintain my picnic table?

A: Regularly clean your picnic table and reapply a protective sealant every few years, depending on weather conditions and the type of finish you used.

And there you have it! Congratulations on building your own amazing picnic table. Now get ready for some fun summer barbecues and outdoor gatherings!

Read More..

Illuminated Outdoor Retreats: Comprehensive Pergola Plans with Integrated Lighting

The allure of outdoor living extends far beyond the daylight hours. To fully appreciate the beauty and tranquility of a garden or patio, thoughtful planning for evening use is essential. A pergola, with its elegant structure and shading capabilities, provides an ideal foundation for creating a captivating outdoor space usable well into the night. This article explores detailed plans for pergolas incorporating integrated lighting, transforming your backyard into a magical oasis for evening relaxation and entertainment.

Planning Your Illuminated Pergola: Considerations for Design and Functionality

Before embarking on construction, meticulous planning is crucial to ensure the pergola meets your specific needs and aesthetic preferences. Several key considerations will guide the design process, influencing both the structural integrity and the lighting scheme.

Site Assessment and Dimensions

The first step involves a thorough assessment of the site. Identify the location where the pergola will be placed, considering factors such as sunlight exposure, proximity to existing structures, and desired views. Measure the available space accurately to determine the appropriate dimensions of the pergola. Overly ambitious dimensions can lead to structural instability, while underestimating the required space might limit functionality and comfort.

Material Selection: Durability and Aesthetics

The choice of materials significantly impacts the pergola’s lifespan, aesthetic appeal, and the integration of lighting. Wood offers a classic and versatile option, allowing for a wide range of design styles. However, it requires regular maintenance to prevent rot and decay. Metal pergolas, typically constructed from aluminum or steel, boast superior durability and require less maintenance. They also provide excellent support for lighting fixtures. Vinyl offers a low-maintenance alternative, but might not offer the same aesthetic flexibility as wood or metal. The chosen material will also influence the type of lighting system most effectively integrated.

Structural Design and Load Capacity

The structural design must account for the weight of the pergola itself, the roofing material (if any), and the integrated lighting fixtures. Consider local building codes and regulations regarding wind load and snow load, especially if you reside in an area prone to extreme weather conditions. Consult with a structural engineer for complex designs or if you are unsure about the load-bearing capacity of your chosen materials. This step is particularly important when incorporating heavy lighting systems or adding substantial roofing elements.

Lighting Design: Ambiance and Functionality

The lighting design is a crucial aspect of creating an inviting evening atmosphere. Consider the desired ambiance: soft, romantic lighting for intimate gatherings, bright functional lighting for outdoor dining, or a combination of both. Plan the lighting placement strategically to highlight architectural features, illuminate walkways, and create distinct zones within the pergola. This may involve a mix of ambient, task, and accent lighting.

Integrated Lighting Systems: Options and Installation

Several lighting systems can be seamlessly integrated into the pergola structure, offering diverse aesthetic and functional possibilities. Careful consideration of each system's characteristics is vital for optimal results.

Recessed Lighting: Subtle Elegance

Recessed lighting offers a clean, minimalist aesthetic. Lights are installed directly into the pergola’s beams or rafters, providing even illumination without protruding fixtures. This option necessitates careful planning during the construction phase to ensure proper wiring and installation of the recessed housings. LED lights are particularly suitable for recessed applications due to their low heat output and energy efficiency.

Pendant Lights: Focal Points and Style

Pendant lights hang from the pergola’s beams or rafters, creating visual focal points and adding a touch of elegance. Various styles and sizes are available, allowing for customization based on the overall design. Pendant lights can be used to illuminate specific areas within the pergola or to create a more dramatic lighting effect. Ensure the selected pendants are weather-resistant and appropriately rated for outdoor use.

String Lights: Casual Charm

String lights provide a relaxed and informal atmosphere, ideal for casual gatherings and parties. They can be draped across the pergola’s structure, creating a magical ambiance. Consider using LED string lights for their energy efficiency and longer lifespan. Ensure the string lights are adequately protected from moisture and are rated for outdoor use.

Uplighting and Downlighting: Architectural Emphasis

Strategic use of uplighting and downlighting can highlight the pergola’s architectural features and create a dramatic visual effect. Uplighting can be used to accentuate the pergola’s beams and posts, while downlighting provides a more general illumination of the space below. Consider using low-voltage lighting for enhanced safety and to minimize glare.

Solar-Powered Lighting: Sustainable Choice

Solar-powered lighting offers a sustainable and environmentally friendly option. Solar panels charge batteries during the day, which then power the lights at night. This option eliminates the need for electrical wiring, simplifying installation and reducing costs. However, the effectiveness of solar lighting depends on sufficient sunlight exposure.

Construction and Installation Process: Step-by-Step Guide

The construction and installation process should be approached methodically to ensure a structurally sound and aesthetically pleasing pergola with seamlessly integrated lighting. Professional assistance may be required for complex designs or electrical work.

Foundation and Framing

Begin by constructing a solid foundation for the pergola, which may involve concrete footings or pier blocks, depending on the design and soil conditions. Then, erect the framing structure, ensuring accurate measurements and alignment. Pre-drill holes for wiring during the framing stage to avoid damaging the structure later.

Wiring and Electrical Connections

Before installing the roofing and lighting fixtures, run the electrical wiring through the pergola's structure. Use outdoor-rated wiring and conduits to protect the wires from the elements. Ensure all connections are properly made and secured to prevent electrical hazards. Obtain necessary permits for electrical work, and consider hiring a licensed electrician for this crucial step.

Lighting Fixture Installation

Once the wiring is complete, install the lighting fixtures according to the manufacturer's instructions. Ensure proper grounding to prevent electrical shocks. Test the lighting system thoroughly to ensure all lights are functioning correctly before proceeding further.

Roofing and Finishing Touches

Install the roofing material if desired. Choose a material that complements the pergola's design and provides adequate shade. Finally, add any finishing touches, such as paint or stain, to enhance the pergola’s aesthetic appeal. Regular maintenance of the pergola and its lighting system is essential to ensure its longevity and safety.

Conclusion: Transforming Your Outdoor Space

By carefully considering the design aspects, material selection, lighting options, and construction process outlined in this guide, you can create a stunning and functional pergola that seamlessly blends form and function. The integration of lighting extends the usability of your outdoor space, transforming it into a captivating retreat for relaxation, dining, and entertainment. Remember that meticulous planning and attention to detail are key to achieving a successful outcome, resulting in an illuminated outdoor haven you'll enjoy for years to come.

Read More..

Professional Woodworking Benches with Clamps and Vices: A Comprehensive Guide

The woodworking bench, often considered the heart of any workshop, is more than just a surface; it is a multifaceted tool that significantly impacts the efficiency, precision, and safety of woodworking operations. A professional-grade woodworking bench, equipped with robust clamping systems and durable vices, forms the bedrock of successful projects, from intricate joinery to large-scale furniture construction. This comprehensive guide delves into the critical aspects of selecting and utilizing high-quality woodworking benches, emphasizing the integral role of clamps and vices in optimizing their functionality.

Essential Features of a Professional Woodworking Bench

Selecting a professional woodworking bench necessitates careful consideration of several key features that directly influence its performance and longevity. These features extend beyond mere aesthetics, encompassing structural integrity, work surface characteristics, and the integrated clamping and vice systems.

Structural Integrity and Materials

The foundation of any quality workbench is its structural integrity. Solid hardwood construction, typically employing hardwoods like maple, beech, or oak, is paramount. These materials offer exceptional durability, resistance to wear and tear, and the ability to withstand substantial pressure during rigorous woodworking tasks. The bench's design should incorporate robust joinery techniques, such as mortise and tenon joints, to ensure stability and prevent racking under load. The overall construction must be able to endure years of heavy use without warping or compromising its structural integrity.

Work Surface Characteristics

The work surface of a professional woodworking bench must be exceptionally flat and smooth, providing a stable and consistent platform for accurate work. The surface should be resistant to scratches and dents, which can impact precision and compromise the integrity of the workpiece. Some benches incorporate a laminated surface for enhanced durability and ease of cleaning. The size of the work surface is also crucial, providing ample space for large projects while allowing for efficient movement and maneuverability.

Integrated Clamping and Vice Systems

The inclusion of integrated clamping and vice systems is a defining characteristic of a professional woodworking bench. These systems provide secure workpiece holding capabilities, freeing up the woodworker's hands for precise tool manipulation. The quality, design, and versatility of these systems significantly impact the overall functionality of the bench.

Types of Clamps and Vices for Woodworking Benches

A range of clamps and vices are available, each with unique characteristics and applications. Choosing the appropriate types for a professional bench depends on the specific woodworking tasks undertaken.

Front Vices

Front vices are typically incorporated into the front face of the bench. These vices offer excellent holding power for a wide range of workpieces, and their position provides convenient access during tasks requiring precise manipulation of the material. Wooden front vices are often preferred for their ability to grip wood securely without damaging it, while metal front vices provide greater strength and clamping force, suitable for tougher materials and heavier-duty tasks.

Tail Vices

Located at the rear of the bench, tail vices provide exceptional clamping capacity for longer workpieces. They typically feature a sliding jaw that can be adjusted to accommodate varying lengths. These vices are essential for tasks such as planing long boards or shaping larger components.

Dog Holes

Dog holes, evenly spaced holes drilled into the bench top, allow for the use of bench dogs and holdfasts. These accessories provide versatile clamping solutions, facilitating a wide variety of clamping setups. They allow for the secure clamping of workpieces at various angles and positions, significantly expanding the bench's capabilities.

Quick-Release Clamps

Quick-release clamps, often integrated into the bench design or used independently, offer rapid clamping and releasing capabilities. They are particularly useful when frequent adjustments are required during assembly or intricate joinery.

Choosing the Right Woodworking Bench for Your Needs

The selection of a professional woodworking bench is a significant investment, demanding careful consideration of individual needs and workshop requirements. Several factors influence the optimal choice:

  • Type of woodworking projects: The scale and complexity of projects dictate the required bench size, clamping capacity, and overall features.
  • Available space: Workshop size significantly influences the dimensions of the bench that can be accommodated.
  • Budget: Professional woodworking benches range in price, reflecting differences in materials, construction, and features.
  • Personal preferences: Woodworkers may have preferences for specific features, such as bench height, work surface material, or specific types of clamps and vices.

Maintenance and Care of Woodworking Benches

Proper maintenance is crucial for preserving the longevity and performance of a professional woodworking bench. Regular cleaning and lubrication of moving parts, such as the vice mechanisms, are vital for ensuring smooth operation and preventing premature wear. Regular inspection for any signs of damage or loosening of joints allows for timely repairs, preventing potential safety hazards. The application of a protective finish to the bench top helps to protect against scratches and moisture damage, maintaining its appearance and extending its service life. Regular waxing or oiling of wooden surfaces also helps maintain their integrity.

Conclusion

A professional woodworking bench, equipped with robust clamping and vice systems, is an indispensable investment for any serious woodworker. The selection process requires careful consideration of various factors, encompassing structural integrity, work surface characteristics, and the versatility of the integrated clamping systems. By understanding the nuances of different clamp and vice types and by choosing a bench that aligns with individual needs and workshop requirements, woodworkers can establish a robust and efficient workspace, fostering creativity and enhancing the quality of their projects. Regular maintenance ensures the longevity and continued performance of this crucial woodworking tool, representing a sound investment in both skill development and project success.

Read More..

Durable Wooden Tables for Family Dining and Gatherings

The heart of any home, particularly for families, often centers around the dining table. It's a space for shared meals, lively conversations, homework assistance, and the creation of lasting memories. Therefore, selecting a dining table that is not only aesthetically pleasing but also robust and durable is a crucial decision. Wooden tables, with their inherent beauty and resilience, stand out as a superior choice for families seeking a long-lasting and versatile centerpiece for their home.

The Enduring Appeal of Wooden Dining Tables

Wooden dining tables possess an undeniable charm that transcends fleeting trends. Their natural warmth and inherent beauty contribute to a welcoming and inviting atmosphere. Unlike their metal or glass counterparts, wooden tables exude a sense of timeless elegance, seamlessly integrating into a variety of interior design styles, from rustic farmhouse to contemporary minimalist.

Aesthetic Versatility and Timeless Design

The versatility of wood is unparalleled. From the rich, dark tones of mahogany and walnut to the lighter, brighter hues of oak and maple, the range of wood species offers endless possibilities for customization and personalization. Furthermore, the inherent grain patterns and natural variations within each piece of wood ensure that no two tables are ever truly alike, adding a unique character to your dining space. This inherent uniqueness makes a wooden table a cherished heirloom, capable of being passed down through generations, accumulating stories and memories along the way.

Durability and Longevity: A Sound Investment

Investing in a high-quality wooden dining table is a sound financial decision. With proper care and maintenance, a well-constructed wooden table can last for decades, even generations. Unlike cheaper alternatives that may chip, crack, or become unstable over time, a sturdy wooden table stands the test of time, enduring the rigors of daily family life with grace and resilience. This inherent durability translates to long-term value, making it a worthwhile investment for families seeking a lasting centerpiece for their home.

Choosing the Right Wood for Your Family's Needs

The selection of wood species significantly impacts the table's durability, appearance, and maintenance requirements. Understanding the characteristics of different woods is essential for making an informed decision.

Hardwoods vs. Softwoods: A Comparative Analysis

Hardwoods, such as oak, maple, cherry, and walnut, are renowned for their strength, density, and resistance to scratches and dents. They are ideal for families with young children or pets who may subject the table to more wear and tear. While often more expensive initially, their longevity makes them a cost-effective choice in the long run. Softwoods, including pine and fir, are generally more affordable but are less durable and more susceptible to damage. They may be suitable for families with a less demanding lifestyle or those prioritizing budget considerations.

Popular Wood Choices and Their Properties

  • Oak: Known for its strength, durability, and beautiful grain patterns. It's a classic choice that ages gracefully.
  • Maple: A lighter-colored wood with a smooth texture and exceptional hardness. It's resistant to scratches and dents, making it ideal for high-traffic areas.
  • Cherry: Features rich reddish-brown tones that deepen with age, developing a beautiful patina over time. It is relatively hard and durable.
  • Walnut: A luxurious choice with dark, rich tones and striking grain patterns. It's highly durable and resistant to damage.
  • Mahogany: A classic choice known for its rich reddish-brown hue, durability, and resistance to rot and decay. It’s a premium choice often associated with elegance.

Factors to Consider When Selecting a Durable Wooden Table

Beyond the wood type, several other factors contribute to the overall durability and longevity of a wooden dining table.

Construction and Joinery: The Foundation of Durability

The quality of construction plays a vital role in the table's longevity. Look for tables constructed with robust joinery techniques, such as mortise and tenon, dowel joints, or quality wood screws. These methods ensure the table's structural integrity and prevent it from becoming loose or wobbly over time. Avoid tables with flimsy construction or inferior joinery, as they are more likely to fail under pressure.

Tabletop Thickness and Stability: Withstanding Daily Use

The thickness of the tabletop significantly impacts its durability and resistance to damage. Thicker tabletops are less susceptible to scratches, dents, and warping. Additionally, a sturdy base and leg design are crucial for ensuring the table's stability and preventing wobbling, especially during boisterous family gatherings.

Finish and Protection: Preserving the Wood's Beauty

The finish applied to the wood plays a crucial role in its protection against spills, scratches, and everyday wear and tear. Opt for high-quality finishes, such as polyurethane or lacquer, which provide a durable protective layer while enhancing the wood's natural beauty. Regular cleaning and occasional re-application of the finish will help maintain the table's appearance and extend its lifespan.

Maintenance and Care for Your Wooden Dining Table

Proper maintenance is key to preserving the beauty and longevity of your wooden dining table. Regular cleaning and occasional care will help protect your investment and ensure that your table remains a cherished centerpiece for years to come.

Regular Cleaning and Protection

Regular cleaning with a damp cloth and mild soap will remove dust and grime. Avoid using harsh chemicals or abrasive cleaners, which can damage the finish. Always dry the table thoroughly after cleaning to prevent water damage.

Addressing Scratches and Dents

Minor scratches and dents can often be repaired with wood fillers or touch-up pens designed to match the wood's color. For more significant damage, consult a professional furniture restorer.

Protecting Against Heat and Moisture

Always use coasters and placemats to protect the table's surface from heat and moisture damage. Avoid placing hot dishes directly onto the tabletop, as this can cause discoloration or warping.

In conclusion, choosing a durable wooden dining table is an investment in the heart of your home. By considering the factors discussed above and selecting a table that meets your family's specific needs and preferences, you can enjoy the beauty and functionality of a high-quality wooden table for many years to come, creating a lasting legacy for your family.

Read More..

DIY Pergola Plans for Creating Shade in Your Garden

Escape the summer heat and transform your garden into a tranquil oasis with a DIY pergola. This versatile structure not only provides welcome shade but also adds architectural interest and enhances the overall aesthetic of your outdoor space. Building your own pergola is a rewarding project that allows for complete customization, letting you tailor the design to your specific needs and style. Forget expensive contractors; this guide empowers you to create the perfect shady retreat yourself, all while enjoying a satisfying sense of accomplishment.

Planning Your Pergola Project

Before you grab your tools, careful planning is crucial for a successful build. Begin by determining the ideal location for your pergola. Consider factors such as sunlight exposure, proximity to your house or other structures, and the overall flow of your garden. Measure the area carefully and sketch out your design, noting the desired dimensions, including height, width, and depth. Choosing the right materials is also key. Pressure-treated lumber offers durability and resistance to rot, while cedar or redwood provide a beautiful natural aesthetic. However, budget and your personal preferences will ultimately dictate your material choice. Finally, acquire all necessary permits before starting construction. This step will prevent potential delays and legal issues down the line.

Choosing the Right Materials

The longevity and appearance of your pergola depend heavily on the materials you select. Pressure-treated lumber is an economical and durable choice, offering excellent resistance to rot and insects. However, if you prefer a more natural look, consider cedar or redwood, known for their rich color and inherent rot resistance. For a truly luxurious pergola, explore options like ipe or teak, which boast exceptional strength and weather resistance. Remember to factor in the cost and availability of your chosen material when planning your budget. Don't forget to purchase all necessary hardware, including screws, bolts, and post anchors, ensuring they are compatible with your chosen wood.

Essential Tools for the Job

Gather all necessary tools before commencing construction to avoid interruptions. You'll need a variety of tools, including:

  • Measuring tape and level
  • Post hole digger or auger
  • Shovel
  • Circular saw or hand saw
  • Drill with various drill bits
  • Impact driver
  • Safety glasses and work gloves
  • Post-hole cement or concrete mix

Having these tools readily available will streamline the construction process, ensuring efficiency and safety.

Building Your Pergola: A Step-by-Step Guide

With your plans finalized and materials gathered, you're ready to start building! Begin by digging holes for the posts, ensuring they are deep enough for stability. Next, set the posts in the holes, using concrete mix for secure anchoring. Once the concrete has set, attach the beams to the posts, ensuring they are level and square. After that, install the rafters, spacing them evenly across the beams. Finally, attach the cross beams for added strength and stability. Remember to regularly check your measurements and levels to ensure accuracy throughout the process.

Adding the Finishing Touches

Once the basic structure is complete, personalize your pergola with finishing touches. Consider adding climbing plants like ivy or jasmine to create a verdant canopy. You could also incorporate string lights for a magical ambiance in the evening. A stain or sealant will protect the wood from the elements and enhance its natural beauty. Choose a color that complements your home and garden's aesthetic. With the addition of comfortable seating and perhaps a small table, you've transformed your garden into a relaxing retreat perfect for enjoying the outdoors.

Enjoying Your New Shady Oasis

Congratulations! You've successfully built your own pergola. Now, relax and enjoy the fruits of your labor. Your new shaded area offers a perfect spot for outdoor dining, reading, or simply unwinding after a long day. Remember to maintain your pergola regularly by cleaning and treating the wood as needed. With proper care, your DIY pergola will provide years of shade and enjoyment, becoming a cherished feature of your garden for years to come.

Read More..

Comprehensive Design and Construction Plans for a Picnic Table with Integrated Benches

This document provides detailed plans for the construction of a robust and aesthetically pleasing picnic table featuring integrated benches. The design prioritizes durability, ease of construction for individuals with moderate woodworking skills, and a classic, timeless aesthetic. Detailed dimensions, material lists, and step-by-step instructions are included to facilitate a successful project.

I. Design Specifications and Material Selection

A. Overall Dimensions

The picnic table will measure 8 feet (96 inches) in length, 36 inches in width, and 30 inches in height. The bench seating on either side will be 16 inches deep and 15 inches high from the ground. These dimensions are optimal for comfortable seating and sufficient table space for a group of four to six people. Adjustments can be made to accommodate specific needs or preferences, but it is recommended to maintain proportional relationships between the table and bench dimensions to preserve structural integrity.

B. Material Selection

The choice of materials significantly influences the table's durability and longevity. Pressure-treated lumber is strongly recommended for its resistance to rot, decay, and insect infestation. Specifically, we suggest using 4x4 pressure-treated lumber for the legs and supports, and 2x6 pressure-treated lumber for the table top and bench seating. All lumber should be kiln-dried to minimize warping and shrinkage. Consider using stainless steel screws and bolts to ensure resistance to corrosion and maximize the table's lifespan. Exterior-grade wood glue will further enhance the structural integrity of the joints.

Material List:

  • Four 8-foot long 4x4 pressure-treated lumber posts for legs
  • Two 8-foot long 2x6 pressure-treated lumber for the table top supports
  • Four 8-foot long 2x6 pressure-treated lumber for bench supports
  • Four 6-foot long 2x6 pressure-treated lumber for the bench seating
  • Two 6-foot long 2x6 pressure-treated lumber for table top
  • Approximately 100 3-inch exterior-grade wood screws
  • Approximately 20 4-inch exterior-grade wood screws
  • Exterior-grade wood glue
  • Stainless steel bolts and washers (size to be determined based on the chosen 4x4 post size)

II. Construction Process

A. Assembling the Leg Assembly

The first step involves creating the leg assembly. Each leg assembly comprises two 4x4 posts joined together using the 2x6 supports. Begin by cutting two 4x4 posts to a height of 30 inches. These will serve as the main support legs. Using a sturdy workbench for stability, carefully drill pilot holes and then attach the 2x6 supports to these posts, ensuring a secure connection with wood glue and long, exterior grade screws. This arrangement creates a strong and stable base for the table.

Important Note: Ensure the 2x6 supports are level and flush before securing them to the posts. Accurate measurement and precise drilling are crucial for a structurally sound assembly. Pre-drilling pilot holes will also help prevent the wood from splitting during screw insertion.

B. Attaching the Tabletop Supports

Once the leg assemblies are completed, the next step involves attaching the supports for the table top. Cut two 8-foot long 2x6 pressure-treated lumber pieces. Place them atop the 2x6 supports already attached to the leg assemblies, ensuring that they are aligned and evenly spaced. Attach these pieces securely using wood glue and screws, creating a level and sturdy platform for the table top. It is vital to make certain that the tabletop supports are parallel to the ground and that the overall assembly is square.

C. Constructing the Bench Supports

The bench supports will be constructed in a similar fashion to the tabletop supports, using the remaining 8-foot long 2x6s. These supports will be attached to the legs in a manner that is parallel to the tabletop supports and appropriately spaced to accommodate the bench seating. Use the previously established measurements to ensure correct positioning and spacing.

D. Attaching the Bench Seating

For the bench seating, cut four 6-foot long 2x6 pressure-treated lumber pieces. Attach these pieces to the bench supports, ensuring they are evenly spaced and securely fastened using wood glue and screws. The end result should be a level and comfortable bench on either side of the table. Consider using countersunk screws to provide a smooth seating surface.

E. Attaching the Table Top

Finally, cut the two 6-foot long 2x6 pieces for the table top. These should be attached to the tabletop supports, ensuring that they are properly aligned and firmly secured with wood glue and screws. The final assembly should be level and stable. Sand all surfaces lightly to smooth any rough edges and splinters.

III. Finishing and Maintenance

Once the construction is complete, it is recommended to apply a weather-resistant sealant to protect the wood from the elements. This will extend the lifespan of the picnic table significantly. Multiple coats are recommended, allowing adequate drying time between applications. Follow the manufacturer's instructions carefully for optimal results.

Regular maintenance is essential for preserving the table's appearance and structural integrity. This involves regular cleaning with soap and water, and occasional reapplication of the sealant as needed. Avoid leaving the table exposed to prolonged periods of extreme weather conditions whenever possible.

IV. Safety Precautions

Always prioritize safety during construction. Wear appropriate safety glasses and work gloves to protect your eyes and hands. Use caution when operating power tools and always ensure proper ventilation in your work area. Dispose of construction waste responsibly, following local regulations.

Following these detailed plans will allow for the construction of a high-quality, durable picnic table with built-in benches. Careful attention to detail during each step of the process is essential to ensuring a successful and long-lasting project. Remember that slight adjustments to the dimensions may be necessary depending on your specific needs and available materials. Always prioritize safety and accurate measurements throughout the construction process.

Read More..

Building Your Empire: Choosing the Right Heavy-Duty Woodworking Bench for Large-Scale Projects

So, you're tackling some seriously ambitious woodworking projects. Maybe you're crafting a full-sized replica of a Victorian-era sleigh, building a stunning, custom-designed dining table, or even constructing a whole gazebo from scratch. You're going to need a workbench that can handle the weight, the abuse, and the sheer scale of your creations. Forget those flimsy, wobbly things from the home improvement store â€" we're talking heavy-duty, industrial-strength workbenches that will be your trusty companions for years to come.

Understanding Your Needs: What Makes a Bench "Heavy-Duty"?

Let's get one thing straight: "heavy-duty" isn't just a marketing term. It means a workbench built to withstand significant weight and repeated, forceful use. This isn't about aesthetics; it's about functionality and longevity. When choosing a heavy-duty workbench for large-scale projects, consider these factors:

Construction Materials: The Foundation of Strength

The materials are everything. Look for workbenches constructed from solid hardwood, like maple or beech, known for their strength and resistance to dents and scratches. Steel or iron components are essential for added durability, especially in areas like the legs and supports. Avoid workbenches made primarily from particleboard or MDF â€" they just won't stand up to the rigors of serious woodworking.

Work Surface Size and Thickness: Room to Maneuver

You're working on large projects, so you need a large, sturdy work surface. A bigger bench allows you to spread out your materials and tools, preventing cramped workspaces that can lead to mistakes and injuries. Thickness is also critical; a thicker surface is less prone to flexing under heavy loads.

Vice Placement and Strength: Holding Your Work Securely

A robust vice is a must-have for any serious woodworking bench, and for large projects, it needs to be extra strong. Consider the placement of the vice â€" you'll want it positioned to comfortably handle the largest pieces you'll be working with. Look for heavy-duty vices with steel jaws and a solid mounting system.

Leg and Support System: Stability is Key

A shaky workbench is a recipe for disaster. Ensure your workbench has a sturdy leg and support system, potentially with cross-bracing for extra stability. Wide legs are preferable to slimmer ones for greater stability, especially when dealing with large, heavy pieces of wood.

Choosing the Right Type of Bench: Tailoring to Your Style

There are several types of heavy-duty workbenches to consider, each with its own strengths and weaknesses. Let's explore a few:

Traditional Wood Workbenches: Classic and Reliable

These workbenches are constructed primarily from hardwood, often with a thick top and robust leg system. They offer excellent stability and durability, and their simple design allows for easy customization. You can add your own vices, dog holes, and other accessories to perfectly suit your needs.

Metal Workbenches: Industrial Strength

Metal workbenches, often made from steel or iron, offer exceptional strength and durability. They are ideal for tasks that involve heavy-duty machinery or tools. However, they might not be as comfortable to work on as wooden benches, and the metal surface can be hard on tools.

Combination Workbenches: The Best of Both Worlds

These workbenches combine the strengths of both wood and metal, often featuring a hardwood top supported by a sturdy steel frame. This combination provides both a comfortable work surface and exceptional strength and stability. They’re often a great middle ground for large projects.

Beyond the Basics: Essential Features for Large Projects

Beyond the fundamental aspects of construction, consider these additional features that can significantly improve your workflow when tackling large-scale projects:

  • Adjustable Height: A workbench with adjustable height allows you to customize it to your body, reducing strain and improving ergonomics.
  • Multiple Vices: For particularly large projects, having multiple vices can be invaluable, allowing you to securely hold multiple pieces simultaneously.
  • Dog Holes: These holes allow you to use woodworking dogs to clamp workpieces, providing additional control and security.
  • Storage: Integrated drawers, shelves, or cabinets can help you keep your tools and materials organized, maximizing your workspace and efficiency.
  • Outfeed Support: This extension beyond the main workbench provides a stable surface for long boards and panels when planing, cutting, or sanding.

Investing in Quality: It Pays Off in the Long Run

Buying a heavy-duty workbench is an investment. While the initial cost might be higher than cheaper alternatives, a well-made workbench will last for decades, providing years of reliable service. Don't skimp on quality; a sturdy, well-designed workbench will enhance your woodworking experience, improve the quality of your work, and ultimately save you money in the long run.

Frequently Asked Questions (FAQs)

Q: How much weight should a heavy-duty workbench be able to support?

A: A truly heavy-duty workbench should be able to support at least 1000 pounds, but many can handle significantly more. Check the manufacturer's specifications for the exact weight capacity.

Q: What's the best type of wood for a workbench top?

A: Hardwoods like maple, beech, and rock maple are excellent choices for workbench tops due to their durability and resistance to dents and scratches.

Q: How do I choose the right size workbench for my needs?

A: Consider the size of the largest pieces you'll be working with. You want enough space to comfortably maneuver around your project without feeling cramped. Measure your workspace and account for the space needed for tools and materials.

Q: Do I need a workbench with a built-in vice, or can I add one later?

A: While adding a vice later is possible, a workbench with a pre-installed vice will usually be a more secure and integrated solution. Check the mounting options if you choose to add one.

Q: How much should I expect to spend on a heavy-duty workbench?

A: Prices vary widely depending on the size, materials, and features. Expect to pay anywhere from a few hundred to several thousand dollars for a high-quality, heavy-duty workbench.

Choosing the right heavy-duty workbench is a crucial step in building your woodworking empire. Take your time, consider your needs, and invest in a workbench that will stand the test of time and support your most ambitious projects!

Read More..